Share |
Showing posts with label Cindy Loo. Show all posts

Sunday, August 19, 2012

Play Ball Layout

Hi All! Have you all had a great summer too? Sorry I have been so neglectful! We have been running a mile a minute around here. All kinds of stuff and activities going on. I am sure it's the same with you though, right?

One of our favorite summer activities is going to the local minor league baseball team's games. The franchise is called The Salt Lake Bee's. Although we went this summer, the pictures used in the layout are actually from last year. I had already printed these pictures some time ago, but didn't know what I was going to do with them. When I pulled them out and they were black and white, inspiration struck. I used the team's colors, black and yellow.

Here is what I came up with:

All of the die cuts are created from my Cricut. See below for the cartridges used.  I used my Cricut to cut out the circles on the black cardstock. Then I took punched circles, slightly larger, and glued them from behind. 

This is my favorite part of the layout. I loved layering all the small little pieces together and then the circle cutout behind.  The different little words and phrases are from a piece of patterned paper made by My Mind's Eye. 

I don't have a Silhouette, but that didn't stop me from using my Cricut to come up with the title for the page! I used the darling font from my Cindy Loo cartridge, all in lower case and then used the negative space. Even though the font is pretty girly, I was able to make it work with the theme of the page by using the negative space. I also eliminated the holes in the letters p, a and b. For the tiny little banners, I cut them actually out from some super cute paper from My Mind's Eye. It's from the line designed by Rhonna Farrer. It was too cute not to use. 

I used the cream and black numbers from a piece of pattern paper from lily bee. I cut them out and placed them in order to represent the number of strikes or outs allotted, as well as the number of innings in the game. The other thing that I liked about this page was using my scallop border punch in a different way. I only punched a portion of each side on the top left and bottom right corners. Then I mounted a full piece of white cardstock behind, so that it showed on each corner. I added some details to tell about the time and place of the pics. 

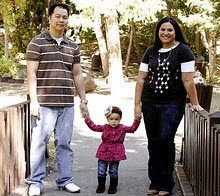
I love this picture of the three of us in our little family having a great time at one of the things we love to do every summer. 
Here are the supplies used:

Cardstock - Bazzil Basics textured black 12"x12"; Stampin' Up! Whisper White 12"x12", Basic Gray textured
Patterned Paper - Stampin' Up; Lily Bee, My Mind's Eye, Pink Paisley
Cardstock Stickers - Lily Bee (some of the pennants on left side)
Punches - Stampin' Up! Scallop Border, 1" Circle, Pennant builder
Cricut Cartridges - George and Basic Shapes (circle outline, circles on left side and full circle for journaling), Forever Young (large flourish at bottom of page and small flourish inside circle outline - both same shape), Cindy Loo (title)
Marker - Stampin' Up! Basic Black
Clear Button - Stampin' Up!
Adhesives - Stampin' Up! Dimensional foam; glue stick

Well, I am off! Hope you all are enjoying your summer! I am sad it's almost over but I am looking forward to fall.

Stay Crafty!

Sunday, April 29, 2012

Look, I Scrapbooked!!!

Do you guys love the Miss Caroline from My Mind's Eye, as much as I do??? For me, it was love at first sight. I ended up getting a little bit of everything from all of the Miss Caroline lines. Once I got the paper, I COULD NOT WAIT TO COME HOME AND SCRAPBOOK! I have not made a page for about 6 months. And I didn't even blog the last page I made because I messed up on the journaling section.

Well, on both of the scrapbook pages I made - that's right, I made 2!!! - I made a spot to hide the journaling. So hopefully when I write down the journaling for each page, even if I don't love the way it turns out, I won't care as much because I can hide them :).

Here is the first page:

Between the photo and the doilies is where the hidden journaling panel is. Once I get it complete, I will show a post on it.

I am crazy about the wood die cuts from My Mind's Eye! I used a butterfly on this page, and a label on the next page. I wish I could die cut wood this thick, myself with my Big Shot or Cricut!
Besides the Miss Caroline paper, I also used some older My Mind's Eye lines for the banner. I thought they all went really well together.

Supplies:

Patterned Paper - My Mind's Eye Miss Caroline
Lace - Webster's Pages {cream trim}, May Arts {yellow trim}
Baker's Twine - Stampin' Up! {Island Indigo}
Thickers - American Crafts
Button's - My Mind's Eye, Stampin' Up!, Bazil Basics,
Brad - My Mind's Eye
Flowers - Prima and Stampin' Up!
Leaf Pins - Maya Road
Half Pearls - Basic Pearls Stampin' Up!
Wood Butterfly die cut - My Mind's Eye
Stamp - doily My Mind's Eye
Ink - Baja Breeze Stampin' Up!
Punches - Mini Heart, Itty Bitty Flower, Fancy Flower, 5 Petal Flower
Stampin' Up!
Doilies - Wilton
Die - Beautiful Butterflies Embosslits die Stampin' Up!

A few things to note, I didn't use any cardstock! It's all patterned paper. Also, the photo editing is from a site called PicMonkey. It's a good replacement for Picnic being gone. There are some really cool effects, and right now, all of them are free. Some day I will learn how to use my Adobe Photoshop program. Until that day comes though, this sight is great!

This next page is my favorite:


I used a combination for the Mister Huey's spritzers from Studio Calico and re-inker refills from Stampin' Up! The re-inkers created the large drops all over the page. It's a technique I will be using a lot more, for sure! My other favorite thing about the page is the banner stamps at the top of the page. These are from My Mind's Eye. Aren't they adorable! And they layer so well!

Supplies:
Cardstock - Stampin' Up! Natural
Patterned Paper - My Mind's Eye Miss Caroline
Thickers - American Crafts
Punches - Scallop border, Fancy Label, Bird Builder, Mini Flower, Itty Bitty Flower Stampin' Up!
Flourish - Cricut Cindy Loo
Die - Beautiful Butterflies Stampin' Up!
Jewels - Pearls and Rhinestones Stampin' Up!
Stamps - My Mind's Eye; Fancy Pants, Stampin' Up!
Button and Brad - My Mind's Eye
Twine - Stampin' Up!
Flower - Prima
Ribbon - Stampin' Up!
Doilies - Wilton
Ink - Baja Breeze, Daffodil Delight, Pretty In Pink, Island Indigo, River Rock stamp pads and re-inkers Stampin' Up!
Spritzers - Mister Huey's

I am off. Hope you all have a great lazy Sunday afternoon!

Stay Crafty!

Sunday, January 1, 2012

Once Upon A Princess

Once upon a time...

There was a little girl who said when she grew up that she wanted to be professional soccer player, tooth fairy, dentist, doctor, and of course a princess. When her family would drive by the large professional soccer stadium she would tell them how much she longed to play there someday. She was a happy girl who loved to dance, sing, dress up, watch movies about fairies and longed for adventures. Cinderella was her favorite princess in the entire world and her favorite color was blue. She loved blue so much she would make her mom go to the blue doors at Super Target any time they went there! She was all ready to be a "big girl" and told her mom she was no longer 3 but 33 years old. She dreamed of big celebrations to spend with her family and friends. She spent lots of time making decorations and invitations for her events. She played hard and loved everyone around her.

The End

I know all mothers think their kid is the best kid in the world. I am by no means the exception. I love how much Peyton loves life and loves her friends and family. She is such a happy girl and she makes me happy that I am her mom.

My Cricut has been a lot of fun already in the short time since I have had it. Although I have mostly done Christmas stuff at this point, I have made a scrapbook page, some cards, and am also currently working on a project for my dad's birthday next week. Peyton's birthday is coming up in February, so I am going to start working on party decorations as well. She wants a princess party, no surprise there :). Right after I got my Cricut, since I only had the cartridge it came with, I ended up purchasing 2 more {not counting the 3 I got trampled for on Black Friday}. One is Cindy Loo. That cartridge has such a fun font!!! I've now used it on a few projects already. The other is Once Upon A Princess. This is such a fun cartridge for all things Peyton! I instantly knew that it would inspire projects for Peyton's birthday party to her bed room, and even some paper dolls for her to play with. I had been working some sort of wall hanging out in my head for the last few weeks since I had got the cartridge, but it took seeing the special issue of Cricut Magazine Home Decor, to get the gears really moving.

Here is what I came up with:


Yep, still addicted to these junk bows. Thanks Amber! :)


A few years ago, I had to ground myself from a little local store called The Wood Connection. I LOVE it! It's full of unfinished wood projects and such. I got the frame from there. It's been sitting in my craft room closet just waiting for me to use it. Hence, the grounding due to excess products purchased there that I have yet to use all of. But I am glad I finally had the perfect use for it. A few years ago - actually 2007 - I posted some small magnet boards. Those were actually purchased from The Wood Connection.

Anyway, here are the supplies used for the frame:

Paint - Acrylic cream
Stamps - Pebbles, Inc.; Stampin' Up!
Ink - Stampin' Up! Chocolate Chip, Baja Breeze, Soft Suede, Old Olive
Ribbon - American Crafts; Stampin Up!; tulle is my stash; Close to My Heart
Cardstock - Stampin' Up!
Patterned Paper - Echo Park; Stampin' Up! {only on junk bow}
Cricut Cartridges - Once Upon A Princess {Princess, butterflies, large scallop border, rose}; Cindy Loo {flourishes, Font}
Punches - Itty Bitty Flower, Tiny Heart Stampin' Up!
Glitter Glue - Stickles
Flair - American Crafts
Jewels and Pearlies - Stampin' Up!
Paper Doily - Wilton


To make the frame "dirty" I take a sponge and cover it in ink - same as when I distress a piece of paper - and then I rub it all over the wood. This is of course once it is painted and the paint is dry. I love the effect. It makes an instant impact.

For the month of December, local paper craft company, American Crafts, had a warehouse sale. I guess they do the same thing every year. I have mentioned many times how much I love their stuff. So I knew I would have to make the trip at least once. I was pleasantly surprised at how much great stuff I found and at such great deals. It's actually where I got all the Crate Paper patterned Christmas paper from. I also got some cheap clear stamps, {we are talking $2 for sets normally $6} including the princess phrases I used in this frame. I also got tons of ribbon. They were ridiculously low {40 spools for $5!}. I even got a large 12x12 paper trimmer there for $8. They had great deals on scrapbooks, inks, Thickers and all kinds of things. Can't wait to check it out next year for sure!


Hope you are all enjoying your holiday week! Happy New Year!

Linking to Paper Issues

Saturday, December 31, 2011

A Little Christmas Cheer to End the Year

Hi Everyone! Yes, yes, I know Christmas is over. Thing is, I have had these pics on my camera for a few weeks and haven't had time to post. So here it all is!

As I have been saying and saying, I want to make a Christmas village. So I made another house to go into it. It doesn't fit the same theme of papers as my house from last year, but I figured it was how all the houses will end up being anyway. As much as I love the one I made the one I made last year, I LOVE this one even more!

Here are the pics:


I am totally in love with picnik. It's so easy to use, it's free and it's tons of fun. As you can tell from the pictures, I was playing around with adding the words to my photos. Not to mention this paper from Crate Paper makes me want to use the 1960s photo edit to every picture of projects made with it! 

Here are all the supplies used to make the house:

Deco Podge House - Hobby Lobby {mid size}
Patterned Paper - Crate Paper
Cardstock - Stampin' Up! Chocolate Chip {used for reindeer}
Mini Ornaments, Bells and Lights - Michael's Crafts
Mini Jingle Bells - Stampin' Up!
Baker's Twine - my stash
Ribbon - Stampin' Up, Michael's
Cricut Cartridges - Cindy Loo {reindeer reins, flourish below roof}, Christmas Cheer {sleigh, reindeer, wreath}, Forever Young {flower on Santa's sleigh}
Pre-made Cutouts - Crate Paper {Santa and Tree}
Jewels and Half Pearls - Stampin' Up!, Reflections; Doodlebug Designs
Border Punches - Stampin' Up!, Martha Stewart
Punch - EK Success {corner rounder to make large scallop trim below roof}
Glues - Mod Podge, Crystal Effects, glue gun


Well, I hope everyone had a great Christmas! We sure did. I asked Peyton what her favorite present was and she said, "Everything Mom. I love everything!" It made my Christmas for sure.

Happy New Year!

Linking to Paper Issues